Difference between revisions of "Official Art"
(→Playable Characters) |
(→Playable Characters) |
||
| (71 intermediate revisions by 2 users not shown) | |||
| Line 1: | Line 1: | ||
==General Information== | ==General Information== | ||
| − | Akira Toriyama, the artist for [[Chrono Trigger]], is renowned for his unique style and skill. He completed several depictions of the main characters, some NPCs and enemies. These were spread through player's guides and other publications, while some anime cels and drawings were cleanly ported to the Playstation release of the game. They have been gathered here in quality heretofore unseen. The scene scans have been done by various people and differ sometimes; each version has been placed here. | + | Akira Toriyama, the artist for [[Chrono Trigger]], is renowned for his unique style and skill. He completed several depictions of the main characters, some NPCs and enemies. These were spread through player's guides and other publications, while some anime cels and drawings were cleanly ported to the Playstation release of the game. They have been gathered here in quality heretofore unseen. The scene scans have been done by various people and differ sometimes; each version has been placed here. |
Note that each item in Chrono Trigger was also drawn. Please consult the Image Indices for Accessories, Armor, Key Items, Items, and Weapons for Chrono Trigger to view those. For Chrono Cross art, click [[Official Art (Chrono Cross)|here]]. | Note that each item in Chrono Trigger was also drawn. Please consult the Image Indices for Accessories, Armor, Key Items, Items, and Weapons for Chrono Trigger to view those. For Chrono Cross art, click [[Official Art (Chrono Cross)|here]]. | ||
| Line 8: | Line 8: | ||
==Playable Characters== | ==Playable Characters== | ||
| + | |||
| + | Note: the October 1997 V-Jump reveals that the chibi portraits were drawn by Toriyama for the status screen, but went unused. See [[Chrono Trigger Prerelease Coverage]] for more. | ||
<gallery> | <gallery> | ||
| − | Image: | + | Image:Ocvxwlpbvsv71.jpg|Cast |
| + | Image:Best_Cast.jpg|Cast | ||
| + | Image:Frank_deWindt_II_V-Jump_May_1995_06.jpg|Cast (V-Jump May '95) | ||
| + | Image:Ayla_CTDS.png|Ayla | ||
Image:Ayla2.jpg|Ayla | Image:Ayla2.jpg|Ayla | ||
Image:Ayla3.gif|Ayla | Image:Ayla3.gif|Ayla | ||
| − | Image: | + | Image:Frank_deWindt_II_V-Jump_Jan_1995_6.jpg|Ayla (V-Jump Jan. '95) |
| − | + | Image:Best_Crono.jpg|Crono | |
| − | + | ||
Image:Crono2.jpg|Crono | Image:Crono2.jpg|Crono | ||
Image:Crono3.gif|Crono | Image:Crono3.gif|Crono | ||
| − | Image: | + | Image:Frank_deWindt_II_V-Jump_April_1995_13.jpg|Crono (V-Jump April '95) |
| + | Image:Best_Frog.jpg|Frog | ||
Image:Frog2.jpg|Frog | Image:Frog2.jpg|Frog | ||
| − | |||
| − | |||
Image:Frog3.gif|Frog | Image:Frog3.gif|Frog | ||
| − | Image: | + | Image:Lucca_CTDS.png|Lucca |
Image:Lucca2.jpg|Lucca | Image:Lucca2.jpg|Lucca | ||
Image:Lucca3.gif|Lucca | Image:Lucca3.gif|Lucca | ||
| − | + | Image:Best_Magus.jpg|Magus | |
| − | + | ||
| − | Image: | + | |
Image:Magus2.jpg|Magus | Image:Magus2.jpg|Magus | ||
| − | Image: | + | Image:Magus.jpg|Magus |
| + | Image:Best_Marle.jpg|Marle | ||
Image:Marle2.jpg|Marle | Image:Marle2.jpg|Marle | ||
| − | |||
| − | |||
Image:Marle3.gif|Marle | Image:Marle3.gif|Marle | ||
| − | Image: | + | Image:Robo_CTDS.png|Robo |
Image:Robo2.jpg|Robo | Image:Robo2.jpg|Robo | ||
Image:Robo3.gif|Robo | Image:Robo3.gif|Robo | ||
| + | Image:IMG_4609.jpg|3D Robo from V-Jump Nov. '96 | ||
| + | Image:Reld_-_V-Festival_1994_02.jpg|Crono (V-Festival 1994) | ||
| + | Image:Reld_-_V-Festival_1994_07.jpg|Marle (V-Festival 1994) | ||
| + | Image:Reld_-_V-Festival_1994_08.jpg|Ayla, Lucca (V-Festival 1994) | ||
| + | Image:Reld_-_V-Festival_1994_09.jpg|Frog, Robo (V-Festival 1994) | ||
| + | Image:Next_gate_last_145dpi.jpg|Small portraits from V-Jump Oct. '97 | ||
| + | Image:Frank_deWindt_II_V-Jump_November_1995_03.jpg|Possible concept art from V-Jump Nov. '95 | ||
| + | Image:sfcposter.jpg | ||
| + | Image:10887579_694091337371625_5265117926654867425_o.jpg|V-Jump March '95 Cover | ||
| + | Image:Frank_deWindt_II_V-Jump_March_1995_01.jpg|V-Jump March '95 Cover | ||
| + | Image:Frank_deWindt_II_V-Jump_April_1995_01.jpg|V-Jump April '95 Cover | ||
| + | Image:Frank_deWindt_II_V-Jump_May_1995_01.jpg|V-Jump May '95 Cover | ||
| + | Image:Cronoblackboard.png|Crono (from Dengeki Super Famicon No. 3 1995) | ||
</gallery> | </gallery> | ||
| + | |||
| + | ===Chrono Trigger PSX Reference Sheets=== | ||
| + | |||
<gallery> | <gallery> | ||
| − | Image: | + | Image:EwR4sRZUcAQEIgU.jpg|Crono |
| + | Image:EwR4sRlU8Ac6eR6.jpg|Marle | ||
| + | Image:EwR4sTBVIAItXMD.jpg|Lucca | ||
| + | Image:EwR5BDxVoActRYi.jpg|Robo | ||
| + | Image:EwR5BCkVgAg1nja.jpg|Frog | ||
| + | Image:EwR5BFHVgAIsife.jpg|Ayla | ||
| + | Image:EwNco_hUYAIEQcB.jpg|Magus | ||
| + | Image:M70594874125_3.jpg|Unknown issue | ||
| + | </gallery> | ||
| + | |||
| + | These materials came from Twitter [https://twitter.com/29kyu/status/1370040578482708488 here], and originally appeared in Japanese magazine "The PlayStation" Vol. 170 (ザ・プレイステーション, released October 22, 1999), starting page 88. If you can, please acquire a copy and get better scans for us using an actual flatbed scanner! These were drawn by Tadayoshi Yamamuro, the Dragon Ball Super and Dragon Ball Heroes character designer. He is known for his straight style, as opposed to Minoru Maeda's more rounded style, and he is recognized as the chief animator and illustrator of the modern Dragon Ball franchise. He became a main character designer for Dragon Ball Z after Minoru Maeda left Toei Animation in November 1992, at the end of the Perfect Cell Saga, a role that he shared with Katsuyoshi Nakatsuru until the end of Dragon Ball GT in November 1997. | ||
| + | |||
| + | ===Chrono Trigger V-Jump Player's Guide=== | ||
| + | |||
| + | The [[Chrono Trigger V-Jump Player's Guide]] has early artwork by Toriyama, including a sketch of Gaspar and accompanying comment proving he was planned to be the eighth character of Chrono Trigger. ''Thanks to Reld'' | ||
| + | |||
| + | <gallery> | ||
| + | Image:VPG_Ayla_Detail.jpg|Ayla | ||
| + | Image:VPG_Crono_Detail.jpg|Crono | ||
| + | Image:VPG_Frog_Detail.jpg|Frog | ||
| + | Image:VPG_Gaspar_Toriyama.jpg|Gaspar and Akira Toriyama | ||
| + | Image:VPG_Lucca_Detail.jpg|Lucca | ||
| + | Image:VPG_Magus_Detail.jpg|Magus | ||
| + | Image:VPG_Marle_Detail.jpg|Marle | ||
| + | Image:VPG_Robo_Detail.jpg|Robo | ||
| + | </gallery> | ||
| + | |||
| + | Reld provided stunning scans of the first two scenes from the player's guide, as well as art foldouts from other V-Jump issues: | ||
| + | |||
| + | <gallery> | ||
| + | Image:KnaSjCAp_o.jpg | ||
| + | Image:H1ErU5g5_o.jpg | ||
| + | Image:Bd9JVQnE_o.jpg | ||
| + | Image:9nJrWC15_o.jpg | ||
| + | Image:TbtpyRCN_o.jpg | ||
| + | Image:LSia9aYW_o.jpg | ||
| + | Image:VirLsRhN_o.jpg | ||
| + | Image:KWIbMSlN_o.jpg | ||
</gallery> | </gallery> | ||
| Line 45: | Line 98: | ||
<gallery> | <gallery> | ||
Image:Azala.jpg|Azala | Image:Azala.jpg|Azala | ||
| + | Image:Frank_deWindt_II_V-Jump_April_1995_05.jpg|Azala (V-Jump April '95) | ||
Image:Belthasar2.png|Belthasar | Image:Belthasar2.png|Belthasar | ||
Image:Chancellor.jpg|Chancellor | Image:Chancellor.jpg|Chancellor | ||
Image:Cronosmom.jpg|Crono's Mom | Image:Cronosmom.jpg|Crono's Mom | ||
| − | |||
| − | |||
Image:Cyrus.jpg|Cyrus | Image:Cyrus.jpg|Cyrus | ||
| + | Image:Frank_deWindt_II_V-Jump_March_1995_07.jpg|Cyrus (V-Jump March '95) | ||
Image:Dalton.jpg|Dalton | Image:Dalton.jpg|Dalton | ||
Image:Doan.jpg|Doan | Image:Doan.jpg|Doan | ||
Image:Dreamteam.jpg|The Dream Team | Image:Dreamteam.jpg|The Dream Team | ||
| − | |||
| − | |||
Image:Fiona2.png|Fiona | Image:Fiona2.png|Fiona | ||
Image:Flea2.png|Flea | Image:Flea2.png|Flea | ||
| + | Image:EwMcsGiWEAAoKUw.jpg|Flea (from "Super Famicom" magazine in Japan; issue unknown) | ||
Image:Gaspar.jpg|Gaspar | Image:Gaspar.jpg|Gaspar | ||
Image:Janus.jpg|Janus | Image:Janus.jpg|Janus | ||
| − | |||
| − | |||
Image:Johnny1.jpg|Johnny | Image:Johnny1.jpg|Johnny | ||
Image:Johnny2.jpg|Johnny | Image:Johnny2.jpg|Johnny | ||
Image:Kingguardia.jpg|King Guardia | Image:Kingguardia.jpg|King Guardia | ||
Image:Kino.jpg|Kino | Image:Kino.jpg|Kino | ||
| − | + | Image:Frank_deWindt_II_V-Jump_December_1995_01.jpg|Lavos internal schematic from V-Jump Dec. '95 | |
| − | + | ||
Image:Leene.jpg|Leene | Image:Leene.jpg|Leene | ||
Image:Masaandmune.jpg|Masa and Mune | Image:Masaandmune.jpg|Masa and Mune | ||
Image:Melchior.jpg|Melchior | Image:Melchior.jpg|Melchior | ||
Image:Ozzie.jpg|Ozzie | Image:Ozzie.jpg|Ozzie | ||
| − | |||
| − | |||
Image:Prophet.jpg|The Prophet | Image:Prophet.jpg|The Prophet | ||
Image:Queenzeal.jpg|Queen Zeal | Image:Queenzeal.jpg|Queen Zeal | ||
| + | Image:Frank_deWindt_II_V-Jump_March_1995_03.jpg|Queen Zeal (V-Jump March '95) | ||
Image:Schala.jpg|Schala | Image:Schala.jpg|Schala | ||
Image:Slash.png|Slash | Image:Slash.png|Slash | ||
| − | + | Image:P160.jpg|Slash (better) | |
| − | + | ||
Image:Tata.jpg|Tata | Image:Tata.jpg|Tata | ||
Image:Toma2.png|Toma | Image:Toma2.png|Toma | ||
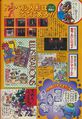
| + | Image:Frank_deWindt_II_V-Jump_Feb_1995_01.jpg|Ozzie, Flea, Slash (V-Jump Feb. '95) | ||
| + | Image:Frank_deWindt_II_V-Jump_March_1995_06.jpg|Dalton, The Prophet (V-Jump March '95) | ||
| + | Image:Frank_deWindt_II_V-Jump_March_1995_04.jpg|Janus, Schala (V-Jump March '95) | ||
| + | Image:Mysticalknights.png|Mystical Knights (from Dengeki Super Famicon No. 3 1995) | ||
</gallery> | </gallery> | ||
| + | |||
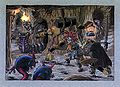
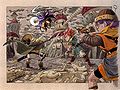
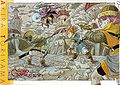
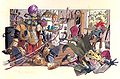
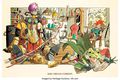
==Scenes== | ==Scenes== | ||
| + | ''Thanks to Reld for V-Jump Appendix'' | ||
| + | |||
<gallery> | <gallery> | ||
| − | Image: | + | Image:Best_Box_Art.jpg|Box Art |
Image:ctmapscan.jpg|Box Art | Image:ctmapscan.jpg|Box Art | ||
| − | Image: | + | Image:T_Dactyl_Ride.jpg|Dactyl Ride |
| − | Image: | + | Image:T_Dactyl_Ride_Custom_Levels.jpg|Dactyl Ride (Custom Levels) |
| − | + | Image:Best_Epoch.jpg|Epoch | |
| − | + | Image:Best_Epoch_Designs.jpg|Epoch Designs | |
| − | Image: | + | Image:Reld_-_V-Festival_1994_03.jpg|Epoch Designs (V-Festival 1994) |
| − | Image: | + | Image:T_Forest_Camp.jpg|Forest Camp |
| − | Image: | + | Image:Poster2.jpg|Forest Camp (V-Jump) |
| − | Image: | + | Image:Best_Jet_Bike.jpg|Jet Bike |
| − | + | Image:Best_Jet_Bike_Designs.jpg|Jet Bike Designs | |
| − | + | Image:Best_Magic_Cave.jpg|Magic Cave | |
| − | Image: | + | Image:Best_Magus_Battle.jpg|Magus Battle |
| − | Image: | + | Image:Poster1.jpg|Magus Battle (V-Jump) |
| − | Image: | + | Image:Best_Medina_Battle.jpg|Medina Battle |
| − | Image: | + | Image:Best_The_Pendant.jpg|Pendant |
| − | + | Image:T_Resting_at_Luccas.jpg|Resting at Lucca's | |
| − | + | Image:Lf.jpg|Resting at Lucca's | |
| − | Image: | + | |
| − | Image: | + | |
| − | Image: | + | |
| − | Image: | + | |
| − | + | ||
| − | + | ||
| − | + | ||
| − | + | ||
| − | Image: | + | |
| − | Image: | + | |
| − | + | ||
| − | + | ||
Image:cast.png|Soundtrack Art | Image:cast.png|Soundtrack Art | ||
| + | Image:cast2.png|Soundtrack Art (ripped from CT DS site) | ||
Image:v-jump_scene_1.jpg|V-Jump Art 1 | Image:v-jump_scene_1.jpg|V-Jump Art 1 | ||
| + | Image:Illus3.jpg|V-Jump Art 1 | ||
Image:v-jump_scene_2.jpg|V-Jump Art 2 | Image:v-jump_scene_2.jpg|V-Jump Art 2 | ||
| + | Image:CT-Dr 150.jpg|V-Jump Art 3 | ||
| + | Image:Techs.jpg|From VJump's Atsusugiru souryoku tokushuu Appendix (Feb. 95 issue) | ||
| + | Image:OLrrv5mv_o.jpg|Clean version | ||
| + | Image:RdjgHQRA_o.png|Clean PNG (Transparent background) | ||
| + | </gallery> | ||
| + | |||
| + | ===Chrono Trigger Ultimania and Masato Kato=== | ||
| + | |||
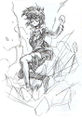
| + | [[Chrono Trigger Ultimania]] has a couple pages of very early concept art for Chrono Trigger done by Masato Kato. | ||
| + | |||
| + | <gallery> | ||
| + | Image:P584_Idea_Sketch_I.jpg|Idea Sketch | ||
| + | Image:P585_Idea_Sketch_II.jpg|Idea Sketch | ||
| + | Image:Kato_CT_Sketch.jpg|Released by Kato | ||
| + | Image:65814_112177828850713_7516796_n.jpg|Released by Kato | ||
| + | Image:Tumblr_oc07loYEve1ulp8mfo1_1280.jpg|Alternate scan | ||
| + | Image:Tumblr_oc07loYEve1ulp8mfo2_1280.jpg|Alternate scan | ||
| + | Image:Tumblr_oc07loYEve1ulp8mfo3_1280.jpg|Alternate scan | ||
| + | Image:Tumblr_oc07loYEve1ulp8mfo4_1280.jpg|Alternate scan | ||
| + | Image:H6ACFdZ.jpg|Queen Zeal (unknown source) | ||
</gallery> | </gallery> | ||
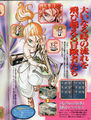
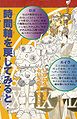
===V-Jump=== | ===V-Jump=== | ||
| − | In the second [[ | + | In the second [[Chrono Trigger Prerelease Coverage|V-Jump preview video]], scene art is shown with the entire frame represented. |
[[Image:vlcsnap-131565.png]] [[Image:vlcsnap-131589.png]] | [[Image:vlcsnap-131565.png]] [[Image:vlcsnap-131589.png]] | ||
| Line 134: | Line 198: | ||
[[Image:vlcsnap-131897.png]] | [[Image:vlcsnap-131897.png]] | ||
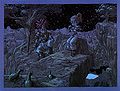
| − | ==Anime | + | ==Anime Scenes== |
| − | + | ||
| − | + | ||
| − | + | ||
| − | + | ||
| − | + | ||
| − | + | ||
<gallery> | <gallery> | ||
| + | Image:AntipodeFixed.png|Ice and Flame | ||
| + | Image:Ayla4Fixed.png|Ayla's Entrance | ||
| + | Image:Ayla5Fixed.png|Ayla and the Dactyl | ||
| + | Image:Ayla6Fixed.png|Chief, Fly High | ||
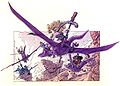
Image:Epoch2Fixed.png|The Epoch | Image:Epoch2Fixed.png|The Epoch | ||
| − | Image:Epoch3Fixed.png| | + | Image:Epoch3Fixed.png|Wings of Time |
| − | Image:Frog5Fixed.png| | + | Image:Frog5Fixed.png|Into the Maw of Darkness |
| − | Image:Marle4.png| | + | Image:Marle4.png|Smiling Princess |
| − | + | Image:WeddingFixed.png|Wedding Ceremony | |
| − | + | ||
| − | Image:WeddingFixed.png| | + | |
Image:Ffchronicles screen014.jpg|GS Preview Shot | Image:Ffchronicles screen014.jpg|GS Preview Shot | ||
Image:Ffchronicles screen013.jpg|GS Preview Shot | Image:Ffchronicles screen013.jpg|GS Preview Shot | ||
Image:Ffchronicles screen011.jpg|GS Preview Shot | Image:Ffchronicles screen011.jpg|GS Preview Shot | ||
| − | |||
| − | |||
Image:ct_01.jpg|GS Preview Shot | Image:ct_01.jpg|GS Preview Shot | ||
</gallery> | </gallery> | ||
| Line 164: | Line 222: | ||
Image:CT Alpha Ayla.png|Ayla | Image:CT Alpha Ayla.png|Ayla | ||
Image:CT Alpha Frog.png|Frog | Image:CT Alpha Frog.png|Frog | ||
| − | |||
| − | |||
Image:CT Alpha Lucca.png|Lucca | Image:CT Alpha Lucca.png|Lucca | ||
Image:CT Alpha Robo.png|Robo | Image:CT Alpha Robo.png|Robo | ||
Image:CT Alpha Epoch Design.png|Epoch | Image:CT Alpha Epoch Design.png|Epoch | ||
| + | </gallery> | ||
| + | |||
| + | ==Locations== | ||
| + | |||
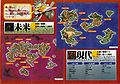
| + | A few special world maps were drawn for the [[Chrono Trigger V-Jump Player's Guide]]. | ||
| + | |||
| + | <gallery> | ||
| + | Image:Ctvmap1.jpg | ||
| + | Image:Ctvmap2.jpg | ||
| + | Image:March_96_191_150.jpg|Tyrano Lair concept art from V-Jump March '96 | ||
| + | </gallery> | ||
| + | |||
| + | ==Steam Version Art== | ||
| + | |||
| + | The art was provided clean via (sadly) medium-res bonus feature images. ''Thanks to Acacia Sgt'' | ||
| + | |||
| + | <gallery> | ||
| + | Image:Gr_000.png | ||
| + | Image:Gr_001.png | ||
| + | Image:Gr_002.png | ||
| + | Image:Gr_003.png | ||
| + | Image:Gr_004.png | ||
| + | Image:Gr_005.png | ||
| + | Image:Gr_006.png | ||
| + | Image:Gr_007.png | ||
| + | Image:Gr_008.png | ||
| + | Image:Gr_009.png | ||
| + | Image:Gr_010.png | ||
| + | Image:Gr_011.png | ||
| + | Image:Gr_012.png | ||
| + | Image:Gr_013.png | ||
| + | Image:Gr_014.png | ||
| + | Image:Gr_015.png | ||
</gallery> | </gallery> | ||
''From'': [[Chrono Trigger]] | ''From'': [[Chrono Trigger]] | ||
Latest revision as of 02:15, 10 December 2023
Contents
General Information
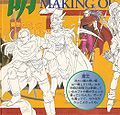
Akira Toriyama, the artist for Chrono Trigger, is renowned for his unique style and skill. He completed several depictions of the main characters, some NPCs and enemies. These were spread through player's guides and other publications, while some anime cels and drawings were cleanly ported to the Playstation release of the game. They have been gathered here in quality heretofore unseen. The scene scans have been done by various people and differ sometimes; each version has been placed here.
Note that each item in Chrono Trigger was also drawn. Please consult the Image Indices for Accessories, Armor, Key Items, Items, and Weapons for Chrono Trigger to view those. For Chrono Cross art, click here.
Click a gallery thumbnail to see the full image. Credit to CuteLucca for most of the NPC scans, and Aitrus for filtering dot patterns.
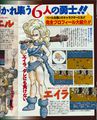
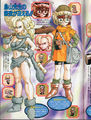
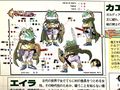
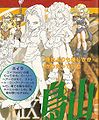
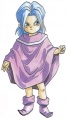
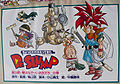
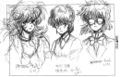
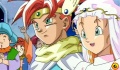
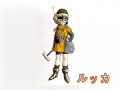
Playable Characters
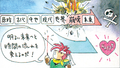
Note: the October 1997 V-Jump reveals that the chibi portraits were drawn by Toriyama for the status screen, but went unused. See Chrono Trigger Prerelease Coverage for more.

Cast
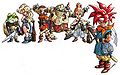
Cast

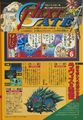
Cast (V-Jump May '95)
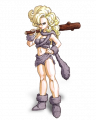
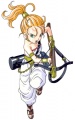
Ayla
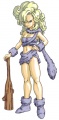
Ayla

Ayla
Ayla (V-Jump Jan. '95)

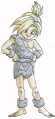
Crono
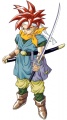
Crono

Crono

Crono (V-Jump April '95)
Frog

Frog

Frog
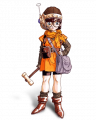
Lucca
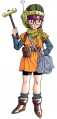
Lucca

Lucca

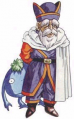
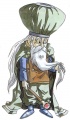
Magus
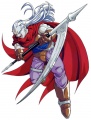
Magus
Magus

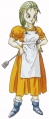
Marle
Marle
Marle
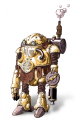
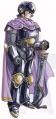
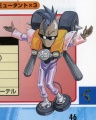
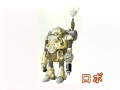
Robo

Robo
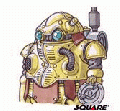
Robo
3D Robo from V-Jump Nov. '96
Crono (V-Festival 1994)
Marle (V-Festival 1994)
Ayla, Lucca (V-Festival 1994)
Frog, Robo (V-Festival 1994)
Small portraits from V-Jump Oct. '97
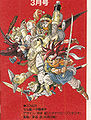
Possible concept art from V-Jump Nov. '95
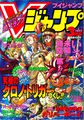
V-Jump March '95 Cover

V-Jump March '95 Cover

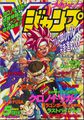
V-Jump April '95 Cover
V-Jump May '95 Cover
Crono (from Dengeki Super Famicon No. 3 1995)


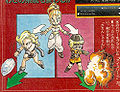
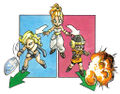
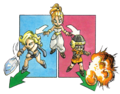
Chrono Trigger PSX Reference Sheets

Crono
Marle
Lucca
Robo
Frog
Ayla
Magus
Unknown issue


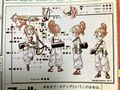
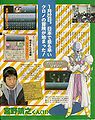
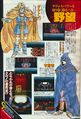
These materials came from Twitter here, and originally appeared in Japanese magazine "The PlayStation" Vol. 170 (ザ・プレイステーション, released October 22, 1999), starting page 88. If you can, please acquire a copy and get better scans for us using an actual flatbed scanner! These were drawn by Tadayoshi Yamamuro, the Dragon Ball Super and Dragon Ball Heroes character designer. He is known for his straight style, as opposed to Minoru Maeda's more rounded style, and he is recognized as the chief animator and illustrator of the modern Dragon Ball franchise. He became a main character designer for Dragon Ball Z after Minoru Maeda left Toei Animation in November 1992, at the end of the Perfect Cell Saga, a role that he shared with Katsuyoshi Nakatsuru until the end of Dragon Ball GT in November 1997.
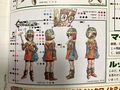
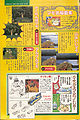
Chrono Trigger V-Jump Player's Guide
The Chrono Trigger V-Jump Player's Guide has early artwork by Toriyama, including a sketch of Gaspar and accompanying comment proving he was planned to be the eighth character of Chrono Trigger. Thanks to Reld
Ayla

Crono
Frog
Gaspar and Akira Toriyama
Lucca
Magus

Marle
Robo


Reld provided stunning scans of the first two scenes from the player's guide, as well as art foldouts from other V-Jump issues:


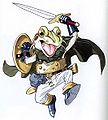
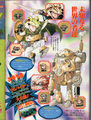
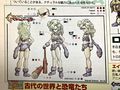
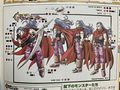
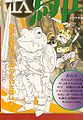
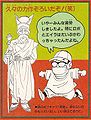
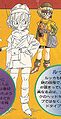
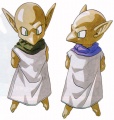
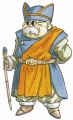
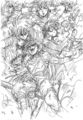
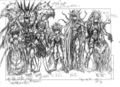
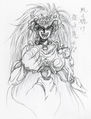
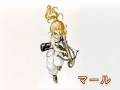
Non-Playable Characters
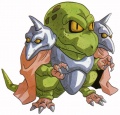
Azala
Azala (V-Jump April '95)
Belthasar
Chancellor
Crono's Mom
Cyrus
Cyrus (V-Jump March '95)
Dalton
Doan

The Dream Team

Fiona

Flea
Flea (from "Super Famicom" magazine in Japan; issue unknown)

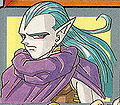
Gaspar
Janus

Johnny
Johnny
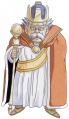
King Guardia
Kino
Lavos internal schematic from V-Jump Dec. '95

Leene
Masa and Mune
Melchior

Ozzie

The Prophet
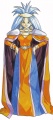
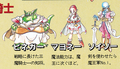
Queen Zeal
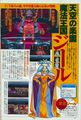
Queen Zeal (V-Jump March '95)

Schala
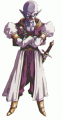
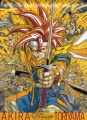
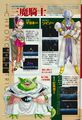
Slash
Slash (better)

Tata

Toma
Ozzie, Flea, Slash (V-Jump Feb. '95)
Dalton, The Prophet (V-Jump March '95)

Janus, Schala (V-Jump March '95)
Mystical Knights (from Dengeki Super Famicon No. 3 1995)


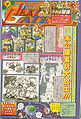
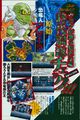
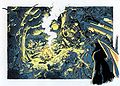
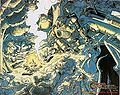
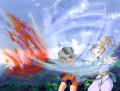
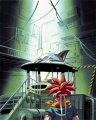
Scenes
Thanks to Reld for V-Jump Appendix

Box Art
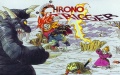
Box Art
Dactyl Ride
Dactyl Ride (Custom Levels)
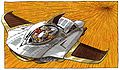
Epoch
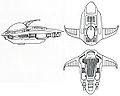
Epoch Designs
Epoch Designs (V-Festival 1994)
Forest Camp
Forest Camp (V-Jump)
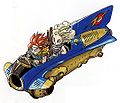
Jet Bike
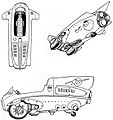
Jet Bike Designs
Magic Cave
Magus Battle
Magus Battle (V-Jump)

Medina Battle
Pendant
Resting at Lucca's
Resting at Lucca's
Soundtrack Art

Soundtrack Art (ripped from CT DS site)

V-Jump Art 1
V-Jump Art 1

V-Jump Art 2
V-Jump Art 3
From VJump's Atsusugiru souryoku tokushuu Appendix (Feb. 95 issue)
Clean version
Clean PNG (Transparent background)


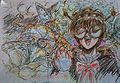
Chrono Trigger Ultimania and Masato Kato
Chrono Trigger Ultimania has a couple pages of very early concept art for Chrono Trigger done by Masato Kato.
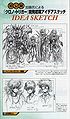
Idea Sketch
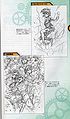
Idea Sketch
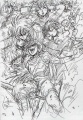
Released by Kato
Released by Kato
Alternate scan
Alternate scan
Alternate scan
Alternate scan
Queen Zeal (unknown source)


V-Jump
In the second V-Jump preview video, scene art is shown with the entire frame represented.


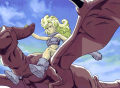
Anime Scenes
Ice and Flame
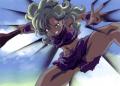
Ayla's Entrance

Ayla and the Dactyl
Chief, Fly High

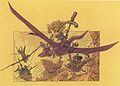
The Epoch
Wings of Time

Into the Maw of Darkness

Smiling Princess

Wedding Ceremony

GS Preview Shot
GS Preview Shot
GS Preview Shot

GS Preview Shot


V-Jump Alpha Version Preview

Crono
Marle

Ayla

Frog
Lucca
Robo
Epoch


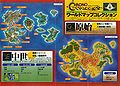
Locations
A few special world maps were drawn for the Chrono Trigger V-Jump Player's Guide.
Tyrano Lair concept art from V-Jump March '96


Steam Version Art
The art was provided clean via (sadly) medium-res bonus feature images. Thanks to Acacia Sgt


From: Chrono Trigger